Custom Clouds For 3D Sky Box – Tutorial

Someone over at Type3 asked me if I could make a quick tutorial on clouds for the 3D Skybox. So here it is!
First off let me say that this is useful for ALL source engine games, but if you’re mapping for Counter-Strike Source you can always use the models for this. Yet if you want a custom look you can always use this!
1. You’ll first need a texture to use for your clouds. I’ve made the one in the screenshot above using FilterForge, but you use what ever your little heart desires.
I’m going to skip showing you how to make one because either you have photoshop/GIMP and know that it can render clouds.
2. (If you downloaded my pack skip this) You will have to make a VMT for them. The VMT will have to have it not receive light, scroll the texture, and make it transparent. So using the VMT code below you can get all of that nice and easy.
“UnlitGeneric”
{
“$basetexture” “Clouds\Clouds1024”
“$translucent” “1”
“Proxies”
{
“TextureScroll”
{
“texturescrollvar” “$basetexturetransform”
“texturescrollrate” “.008″// Change this to change the speed of the clouds
“texturescrollangle” “65”
}
}
}
3. Now you have to implement this into your level. So create a 3D skybox then create a brush covering the whole skybox.
4. Make the BOTTOM FACE ONLY a displacement and check:
- No Physics Collision
- No Hull Collision
- No Ray Collision
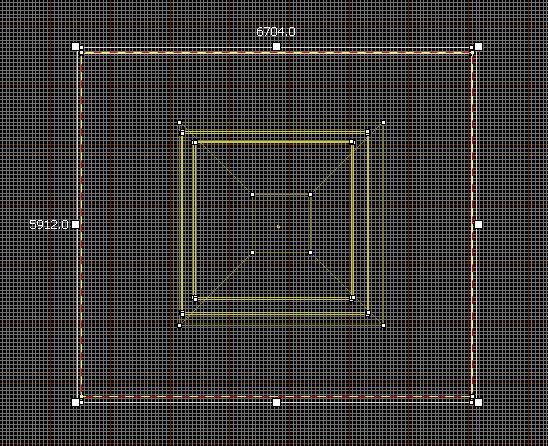
5. Next go to paint geometry, and set radius to the smaller of your two sides. Mine is 5912. Then place the painter in the middle of the displacement and raise it up so it is a dome shape.
 We make it a dome so that the edges go behind the items we have in our 3D skybox so it looks flawless.
6. If you want your sky to look like it’s a cloudy day just copy the cloud displacement up, and change it’s scale and XY shifting. By changing the scale and shifting it will make the clouds move at a different speed, and look like it is not the same texture.
 The scale and XY shifting for this screenshot it:
Top Layer:
Scale X-2 Y-8.9
Shifting X-900 Y-150
Middle Layer:
Scale X-2 Y-8
Shifting X-450 Y-50
Bottom layer:
Scale X-2 Y-7
Shifting X-0 Y-240
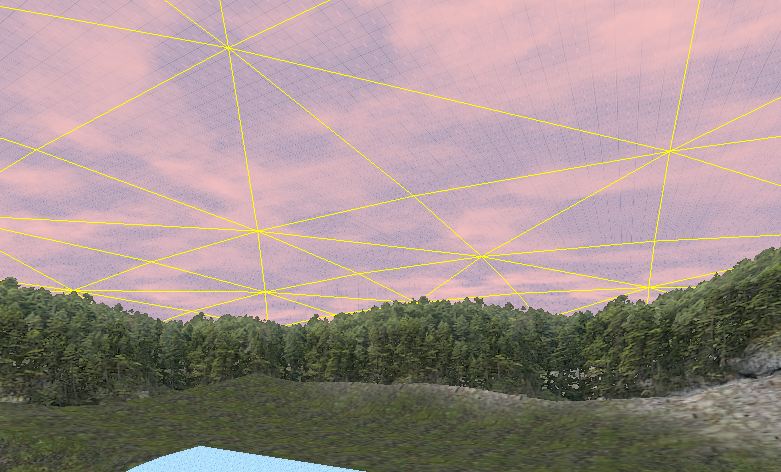
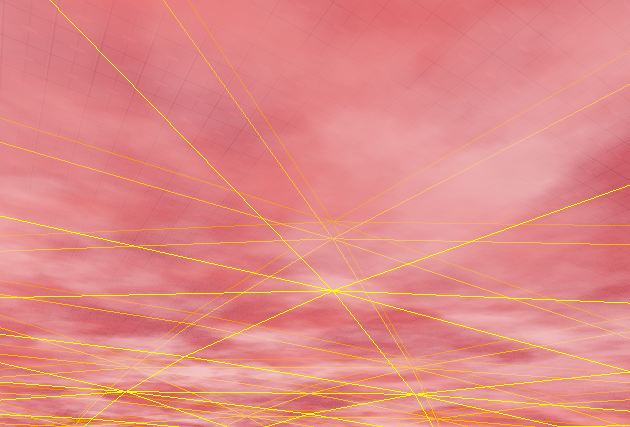
That should just about do it! Here is what the finished thing looks like from different angles.